I managed to find a second hand CNC3020 milling machine on ebay for a nice price so snapped it up. Collecting the machine the person showed it moving around but said he never got on/got it working properly and has given up with it, sound like a challange and I like them 😉
Once I had got it back home and set it all up, installed the software and gave it a try – a quick air cut with the skull and cross-bone test pattern (having the cutter high up and not cutting anything). All looked good so on with a test cut, after setting the cutter hight and setting the machine going and the first cuts were made:
Not too bad apart from the cutter has left marks where the head should have lifted up and the size off the cut is a lot smaller than the diagram shows.
Looking back at the machine moving the spindle 50mm on the mach3 software but it only moving around 30mm on the machine. A quick check with the settings and everything is setup as the instructions say. After some trial and error I found the correct setting (sure it was 320 or 360, where the manual gave 450!) with this sorted out I then set about tuning the motors they seem to have a sweet spot where they sound correct.
I then checked the machine over and found missing and loose screws with these problems corrected I then found the Z axis had 2.83mm off play/backlash I stripped the machine apart and couldn’t find anything wrong? So I got a local machine shop to make me a 2.83mm spacer with this fitted all the backlash had gone and now it should cut correctly 🙂
Next task was to learn G-Code, there lots off guide but it quite a simple line by line text based system with some G-Code handwritten and learnt now to move onto CAD/CAM programs. I tried quite a few but the best one I have found is CamBam this is a 2.5D program where you draw in 2d and add machining depths in to give the .5d. You get 40 free trails so give it go.
Now to make something useful, I did a basic design for a door sign and set the machine off cutting it out
The finished sign:
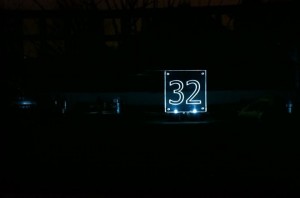
I now used 2 cheap solar LED lights I mounted the LED’s into a drilling so the LED was a tight fit into the sign
With the lights switched off the sign looks like this
As the sign looked good I now un-solded the LED out of the solar light and made some extension wires so the panel can be placed away from the sign.

