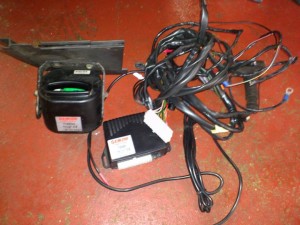
Parts you will need:
VAG-Tacho (Clone lead here)
XVI32 Hex editor
VW Transporter van
(Remember this can brick your dashpod, Everything in the guide worked for my dash doesn’t mean it will work with your dash!!!!!!!)
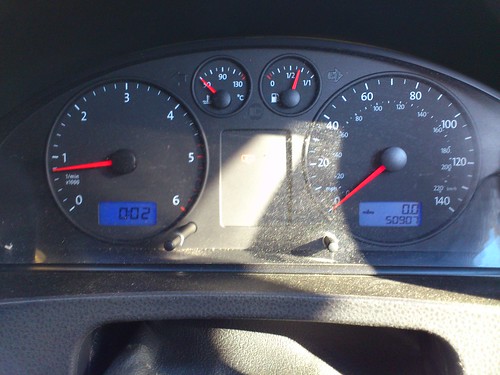
One thing that I have always found strange is that the needles and display light up with the ignition but the gauges don’t?
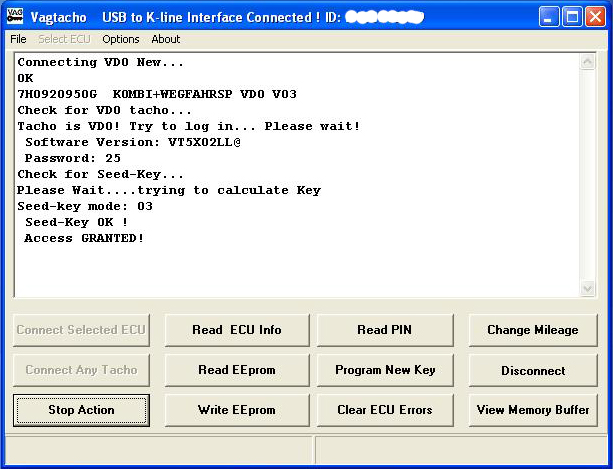
So I set about seeing if I could change this? First of all I connected up VAG-Tacho to the dash and selected VDO new and pressed connect.
After it gained access you then need to click read eeprom, this will take a couple of minutes. Once it finished open the memory buffer and check there what looks like a eeprom dump.
Then click file and save.
Save the file twice, one called original and the other called modded. Leaving VAG-Tacho running, now open your hex editor.
Open the modded eeprom that you saved earlier, once the file is open you will need to find the line 23A (This line is correct for a standard T5 dash without MFA/DIS)
and then find the correct cell.
Once found change the value to to desired value. It will be something like 3X, where X is value you change, Most T5 comes with 3B
3 – displays only
5 – gauges only
7 – displays and gauges only
9 – needles only
B – displays and needles only
D – Needles and Gauges only
F – all lit up
I changed it to 3F
Then save as the modded eeprom file.
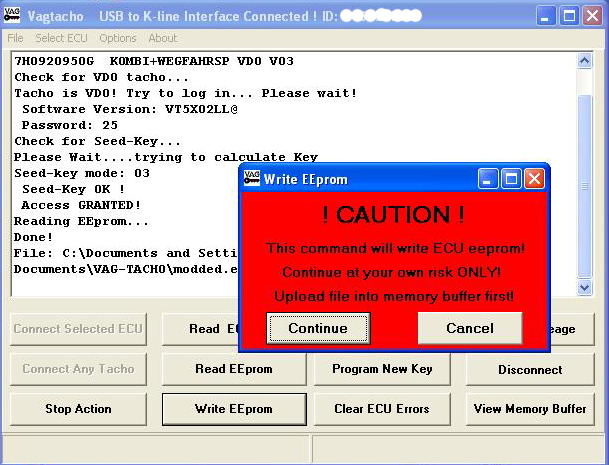
Now back to VAG-Tacho. Click file and Read File, select the modded.eep file and load into memory.
You can now load the modded eeprom back into the dash.
Once complete you can then disconnect and reconnect, after it reconnected click the restart button and hay-presto one lit up dash pod 😀
Remember messing with the eeprom can brick your dashpod, you do this at your own risk!
Here a video of the dash just lighting up with only the ignition.
Here my guide to converting a T5 Lowline dash upto the Highline dash pod.
Tools you will need:
VCDS (VAG-COM) this is used to program the new dashpod in (Clone) (Original)
VAG-Tacho – This removes the PIN (security access code) out of the old dash pod (Clone) (Original)
VAG-Tacho seems to be out of stock so you can use VAG-K+Commander (Click here)
Tools to remove dash trim and the steering wheel
Parts you need:
Wiper stalk with MFA buttons (might as well pop cruise in at the same time if you can)
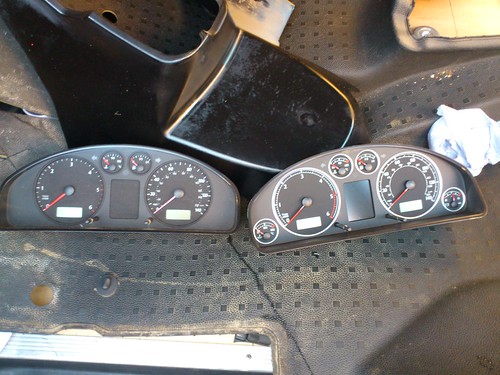
Highline dashpod (theres lots of options make sure it the correct part fro your van)
Wiring loom
How to do it:
Carry out a full scan with VCDS and save the scan, Then make adaption channel map select controller address 17 and change function to adaption, make sure you have a copy of the full scan and a copy of the adaption channel map and take a note of the mileage.
Now we move onto VAG-Tacho, Connect to the dash pod and pull the pin number from the old cluster, While here I took a Eprom dump of the dash pod just incase.
Say Good bye to your old lowline dash
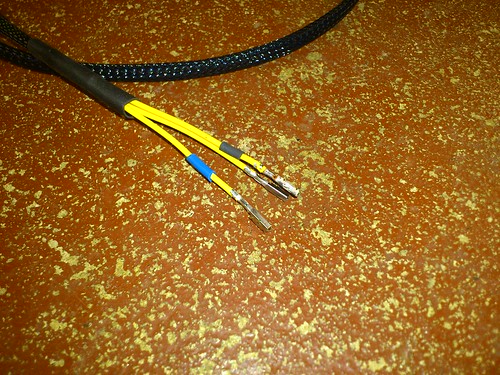
Once you have all this information you can now get the tools out and start taking the van apart. Disconnect the battery then you need to remove the Right lower dash trim, Steering column covers, remove and replace the column switch, you will also need to fit 3 wires into the big 41 pin plug. I have tried every where to find the connectors on there own and with no luck, here are the tiny connectors
So in the end I used some VW repair wires and extended them to make the 3 wire loom – the part number is 000-979-018E and you need 3 off them.
These 3 wires fit into the T41 connector on the back of the indicator switch pins 24-23-18, you have to be very neat fitting the wires otherwise the cover wont fit back on the wiring plug.
Cover refitted:
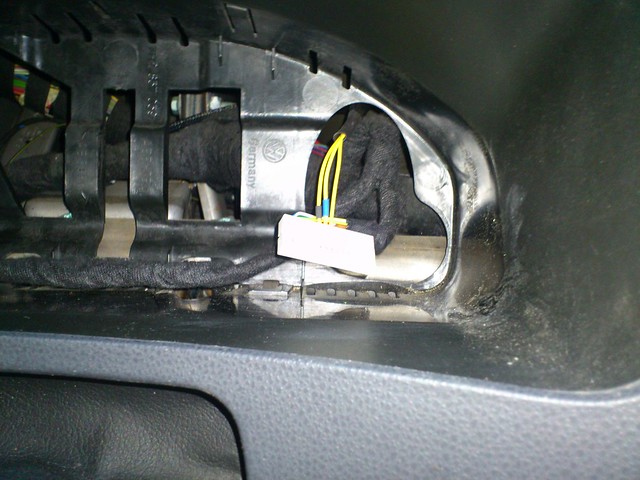
Once the switch is in you need to look under the dash at the back of the dashpod you will see 2x torx screws remove these and pull the dashpod towards you unplug the blue and green connector, you will need to remove the cover off the green plug and put the 3 wires into pins 23-24-25 like this:
(T41) – Function – T32
23 – MFA – – 24
24 – MFA + – 23
18 – MFA r – 25
T41 = 41 pin connector on wiper switch
T32 = Connector on dashpod
Place the highline dashpod into the van and pop everything back together, Once back together reconnect the battery (make sure the battery is good and charged up), Start VCDS and select address 17 – instrument cluster.
Select 07 – Recode and enter the 5 digit code from from your saved scan.
Then choose 10 – Adaption then we choose channel 50 enter the 4 digit pin that VAG-Tacho pulled out but place a 0 before the pin number to make it 5 digits. Then click test and then save, exit back to the main screen and switch the ignition off wait at least 2 minuites. Switch the ignition select 17 – instrument cluster and now in the extra field should be you chassis number (VIN).
Next you match the keys to dashpod (you need to do all the keys you have)
Check you adaption file and in address 09 should be your mileage in KM (x1o) double check this is correct as you only get one chance of doing this!!!!! No select 17 – instrument cluster then 10 – Adaption then channel 09 enter the same value from the old cluster. Exit back out and your mileage should be the same as original. Now enter the numbers from adaption channels 40-45 from old to the new this keeps your service schedule the same.
Now carry out a full scan and clear all the fault codes, check everything works.
Get driving and enjoying you new dash 🙂
Here some videos of the dashpod at night and with the MFA working
This is a guide to help you swap the dashpod to a Highline with MFA, This might not work on every T5 van, the info in this guide might not be correct please check before doing anything to your van!
**** UPDATE *****
I’ve been running my van now and love the highline dashpod. I’ve been trying to get the radio display working and tried a Gamma radio but this still doesn’t work with my dashpod and now know I need a CAN BUS radio for the radio display in the dash to work.
I’ve now started work on my T5 Transporter,
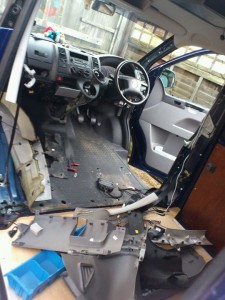
First thing was to remove the aftermarket seats and get the dash board striped out, With the dash out I sent about removing the VW aftermarket alarm that would stop the van starting every now and again
Now for the other planned jobs:
- Fit VW Highline dashpod with Driver information system (MFI or MFA)
- Fit leisure battery and split charge relay wired into the VW central electric module
- Add Phatnoise hard-drive music system in place of CD changer
- Fit new heater control cable
- Fit passenger side sun visor with mirror and lighting
- Fit Passat W8 interior light with LED downlighters
- Fit better lighting for the rear of the van
Stay tuned for more info on this 🙂
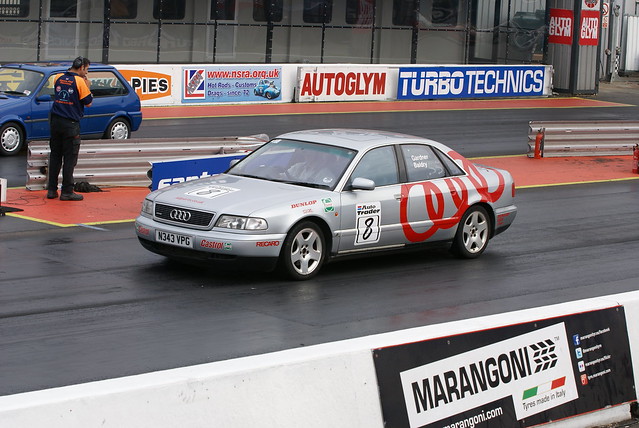
On Friday the 16 September, me and Matt entered the Audi A8 track car into the PPC Practical Performance Car £999 challenge.
The first thing is they couldn’t decide if we could enter because the Audi cost us £1500 3 years ago (You can buy a 4.2 Audi A8 with less miles for around £600 on ebay now!). The moderator on the forum and member of staff said yes, other staff person said no?
We arrived on the Friday just after 9am to people stripping as much weight as possible out of there cars, some other people looking very hungover. We signed on to the track and the chap said the should be no problem with the Audi taking part. Matt had completed the 3 runs and managed 14.3 every run.
As the 3 runs were complete in under an hour they let everyone have more runs until they closed for lunch, we removed the spare wheel and some junk in the boot, back round for a 14.4 run!!!! oh well Matt tired again and 14.2 this time. We let the car cool down and gave it one last session before lunch 14.1 this time and the chap doing commentary saying the Audi A8 is in 3rd place overall, Just before lunch a Subaru STi ran 13.3, this placed him in first place and knocking the Audi to 4th place.
After we stopped for lunch the handling test started, All the cars queued up and they went through the course. The course started by weaving in and out of 4 cones in a straight line then onto and figure of 8 around 2 cones then come to a stop in a box made of 4 cones (5 second penalty for any cone knocked over), Simple we thought.
The first couple of people went and only 1 managed to go the correct way around the course. After the first round the fastest time was 26.3 seconds with the Audi managing 26.6 seconds. A second round went past and times were improved with some people breaking the 25 second mark and some people struggling to stay in a straight line ;-). Then came the 3rd run, some more people broke the 25 seconds with the Audi finishing on 25.3 seconds and a MR2 running 24.4 seconds in first place.
After this all finished the staff went to work out positions, They announced the results:
1st Place – Toyota MR2 – 14.43 – 24.41 – 38.84
2nd Place – Impezza STi – 13.33 – 25.72 – 39.05
3rd Place – Scooby WRX – 14.46 – 25.47 – 39.93
Oh where is the Audi in the results? Turns out they decided there and then that it not allowed to take part, So there no mention of the Audi in any of the results 🙁
The balloon took to the sky again for another Northampton Balloon Festival weekend,
- Northampton Balloon festival 2011
Held again at Billing aquadrome it was good to see them take off, just a shame only 15 balloons out of the 36 confirmed took off. The photos are all from the Friday morning flight.
Photos not available currently.
After some nice hackers decided to deface my old site (What nice wonderful people lol)
I’ve decided for a fresh start with a new website coming soon,
The Great Doddington weather station is still working,
Keep coming back for more updates
© Toby Gardner


